Announcement

Collapse
No announcement yet.

My Clubman Blog

Collapse
X
 
  • Filter
  • Time
  • Show
Clear All
new posts

  • #46
    Many thanks for all the positive comments that my ramblings generate, I suppose judging by the number of times this thread has been read my random thoughts and strange ideas must be of some interest.
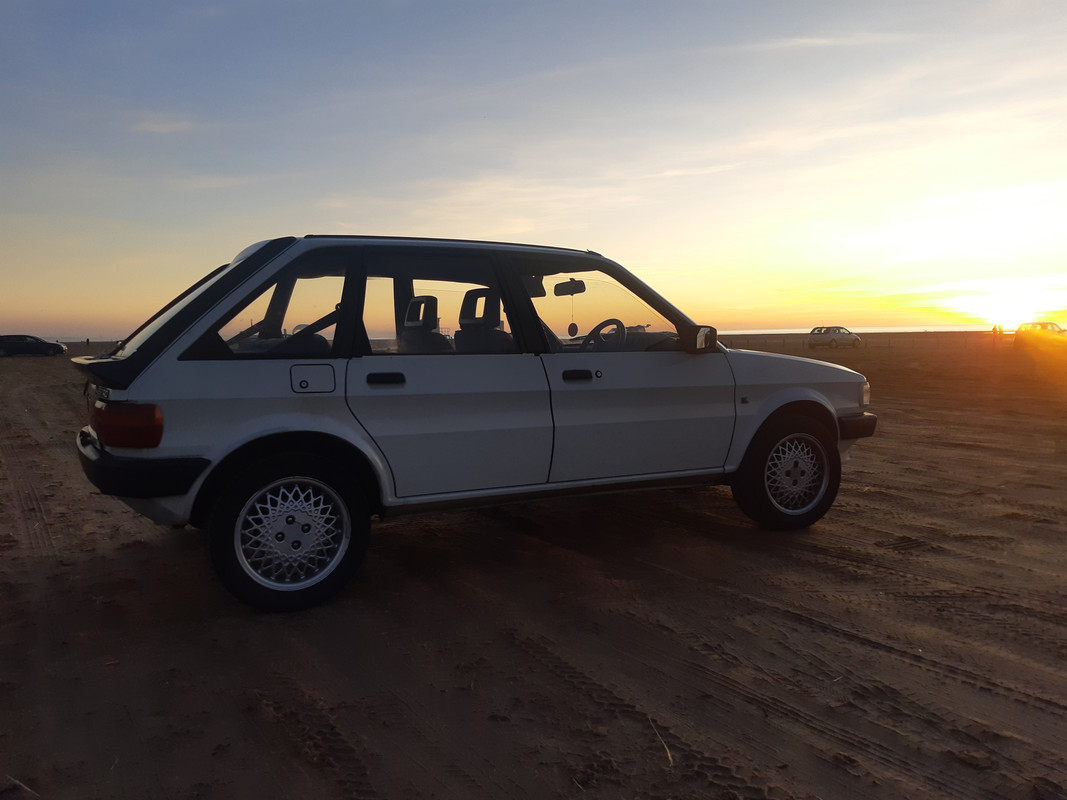
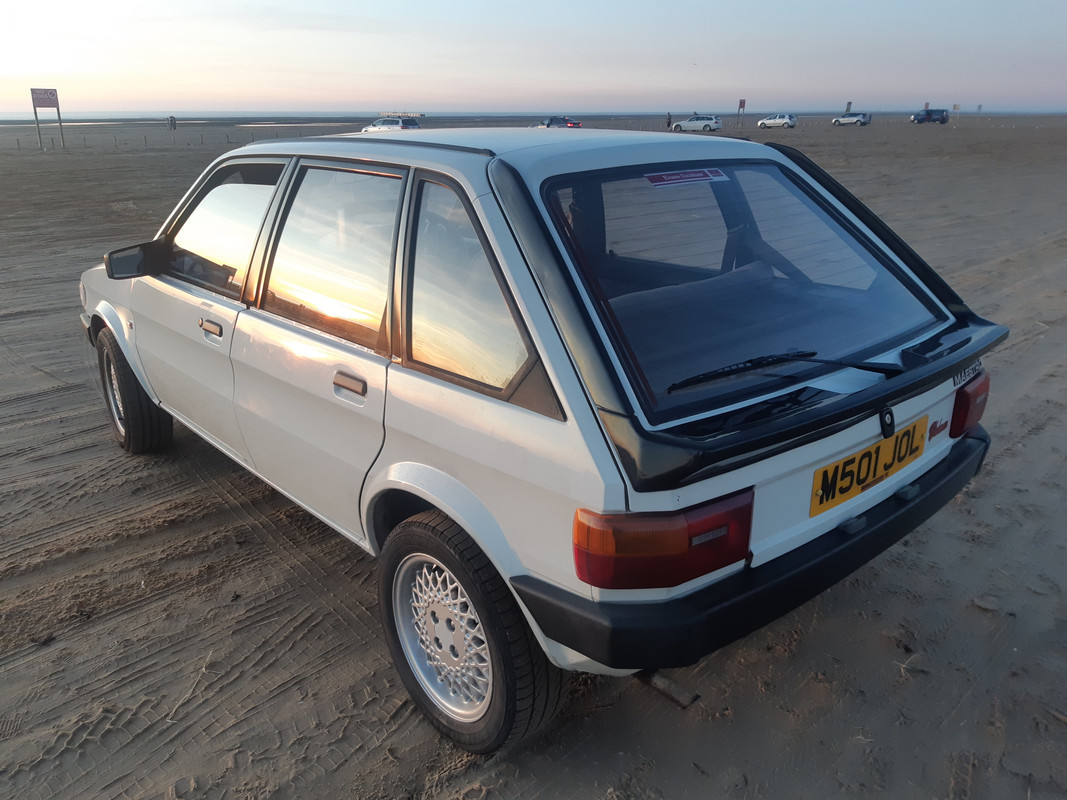
    I sort of regret drilling a totally mint original tailgate to fit the spoiler, but what is done is done. My take on the colour is firstly it was black when I got it and I hoped it would blend with the black bumpers and window trims, but it makes the back look heavy. I will need to get some paint work redone at the front so I will have the spoiler painted white at the same time. That should make it less noticeable. If that fails what about Kawasaki Green?

    David
    My Car Story

    http://www.maestro.org.uk/forums/showthread.php?t=20252

    Comment


    • #47
      Last edited by toonarf; 11th May 2017, 16:51.
      My Car Story

      http://www.maestro.org.uk/forums/showthread.php?t=20252

      Comment


      • #48
        Hi All
        The oil seals that I ordered from ebay turned up OK and were duly fitted earlier this week. This allowed the inner CV joints to fully slide into the diff and the clips engage to lock the shafts in place. This will now hopefully keep the oil in the gearbox.
        The picture below shows the Offside drive shaft.


        This picture shows the Nearside drive shaft these are both standard 20i MG or diesel shafts.


        This picture shows the clearance between the Offside inner wing and the engine. Also visible is the only engine/ gear box mount that I had to make all the rest would work in standard form again from a diesel or 20i MG


        A general picture of the standard gear linkage and the standard under diff mounting.


        And finally a general view of the underside of the engine bay.


        The shafts are at 90 degrees to the cars centre line the strange looking driveshaft angle is a trick of the camera.

        Thanks for looking
        David
        My Car Story

        http://www.maestro.org.uk/forums/showthread.php?t=20252

        Comment


        • #49
          Looks great, good luck with the MOT, doesn't look as though you should have any problems getting it through though! Looking forward to seeing the next instalment....

          Comment


          • #50
            Hi Everyone
            I have spent the day working through my final snagging list, I have re booked a test for Thursday with I hope every chance of making the appointment.
            Whilst the car was outside I took advantage of the sunshine to take a quick couple of photos.


            And finally I came across this photo of me out on a Road Rally .


            Thanks for looking
            David
            My Car Story

            http://www.maestro.org.uk/forums/showthread.php?t=20252

            Comment


            • #51
              Hi All

              Back for the annual update.

              So, the MOT last June did not happen, we bought a house instead…………

              But the good news is that this year the MOT has been passed, Insurance and tax obtained and the roads hit. However I did wait until the roads thawed out.

              The day of the test this year

              So trips out are accompanied with a laptop connected to the car to data log, keep an eye on the engine parameters and alter the tune.

              A visit from my mate with an ex works group N Skoda Favorit

              Thanks for looking

              David
              My Car Story

              http://www.maestro.org.uk/forums/showthread.php?t=20252

              Comment


              • #52
                Hi All
                I thought it may be useful to pass on some interim conclusions on the installation, only interim because so far I have only completed about 60 miles, and presently more attention is being paid to the laptop and how the engine is running than how the car drives. The car is also sat on box stock original 1300 suspension along with standard although overhauled brakes. You will also notice that the throttle bodies are not fitted at the moment which will limit power to the standard 118bhp of a standard 1800 K series.
                The weight of the engine and gearbox is estimated to be about the same as a standard 1300, even quite possibly slightly less so performance is obviously very good and certainly as good as a 2.0i car but with a much lighter feel to the car. I think with a more “sporty” feel to the suspension the car would be a lot better.
                However on the negative side with the need to use so many 2.0i parts to create this installation either a rotten 2 litre car would have to be broken to create a copy of this car or a 2.0i would need its engine and gearbox replaced with the smaller 1800 combo.
                The conversion could easily be done using the ecu and partial loom from the K series engine car that the engine and gearbox came from, the Megasquirt install that I did was for my entertainment and is not necessary to make the car run.

                Finally a photograph of how the engine bay looks at the moment.


                Please feel free to comment or ask questions

                David
                Last edited by toonarf; 20th September 2019, 20:29.
                My Car Story

                http://www.maestro.org.uk/forums/showthread.php?t=20252

                Comment


                • #53
                  I’m interested in how easy the ecu is to wire up in this type of engine swap, the mechanical side doesn’t worry me in the slightest but I wouldn’t know how the electrical side worked ie ecu, dash clocks, etc etc.

                  Comment


                  • #54


                    Hi G4GLM
                    I guess the short answer to your question is that’s why I started my megasquirt project. Not only did I want a cost effective engine management system but also one that I understood. I prefer nuts and bolts to wires like most people so I figured that if I built it, wired it, chose the hardware and set it all up I would understand it. I have to a large extent been successful in this aim.
                    I already had a good understanding of what an engine needs to make it run, basically the right amount of oxygen and fuel ignited at the right time, but no understanding of what the magic box did using all those wires to make a modern engine run. I now understand more about what the wires do and how the magic happens inside the box. As I have said earlier in this thread, about 18 years ago I added a Rover 820 ecu plug to a MG Maestro wiring loom, which for me then was cutting edge. I simply had large copies of both engine management wiring diagrams made and decided which coloured wires needed to be connected together to connect everything together correctly. I took my time, did it over several evenings and worked through one circuit at a time. With the M16 install I was lucky that all the wiring under the bonnet needed to be in the same place for a M16 or a 2.0.i engine and so it simplified the job allowing me to use the 2.0i wiring and plugs in the engine bay.
                    It would be a similar exercise to plant a K series in a Maestro, either use a 2.0i loom and graft the K series plug on or you could take the loom from the K series donor and just use the wires required to operate the engine to make a stand alone loom. You do need an understanding of how the alarm/ immobiliser works and what needs to be done to allow it to operate in its new home or how to disable it.
                    In my megasquirt install I bought a ready wired plug to go into the control unit and simply ran the wires to where they needed to be on the engine thereby creating my own standalone loom.


                    A typical megasquirt diagram with edis

                    On my Clubman I have not fitted a dash with a tachometer so do not need to configure meagsquirt to output a tach signal. The temperature gauge and the alternator are wired back into the car loom with plugged extensions to the original car wiring. Because this shell was in such good condition I did not want to cut any new holes or chop the wiring. The megasquirt could be completely removed along with the engine and the original engine and gearbox re installed.
                    I think from memory MEMS outputs a signal to the cars temp gauge as standard, which can be a problem when transplanting, most easily solved by adding an extra temp sender unit on the engine which is compatible with the cars gauge, ie the cars original sender unit. This is what I have done with the megasquirt install on the Maestro, the K series has a blank port next to the original temp sender unit so I put a Maestro one in that and wired it to the gauge. The megasquirt of course uses its own sender which I got from Bosch and then set its parameters during the megasquirt set up phase.
                    I could go a lot deeper into how the fuel and spark maps are created changed and used by megasquirt using inputs from all the sensors and how it outputs the signals to operate the engine but it may bore many people to death. Please note I do not for one moment consider myself an expert on engine management systems I am entirely self-taught mainly by painstakingly reading my way through the reams of information about megasquirt such as the megamanual to be found here http://www.megamanual.com/MSFAQ.htm and trial and error. But I am happy to try to answer any questions anyone may have.

                    Cheers David
                    My Car Story

                    http://www.maestro.org.uk/forums/showthread.php?t=20252

                    Comment


                    • #55
                      Hi Everyone

                      First post for 2019……… must try harder……

                      Here are some photos of progress to date, mostly just using and enjoying.
                      First photo is of the engine bay after I fitted the throttle bodies. The noise was awesome and I was really getting somewhere with the tune.


                      However the turbo engine was calling and I am weak so this winters project is to turbo her. The VVC style inlet manifold is the one I will use with the turbo. I am sorting the “no boost” turbo settings with the turbo injectors fitted so that I know the engine will run when turboed.


                      Finally a couple of exterior shots


                      Thanks for Looking
                      David

                      Last edited by toonarf; 20th September 2019, 20:41.
                      My Car Story

                      http://www.maestro.org.uk/forums/showthread.php?t=20252

                      Comment


                      • #56
                        I do not want to put a dampner on your lovely car but becarefull of the road tax implications if pulled my the law

                        Comment


                        • #57
                          Hi Everyone

                          My K Series installation seems to have developed some interest on the various Maestro Facebook sites that exist, with other people considering fitting this alternative engine in the Maestro or Montego. So I thought I would add some more detail I may have missed, previously I thought the possibility of anyone repeating my conversion to be remote so may have been a little short on detail. If there are any questions I will be pleased to answer them.

                          [IMG]file:///C:%5CUsers%5CDavid%5CAppData%5CLocal%5CTemp%5Cmsoh tmlclip1%5C01%5Cclip_image002.gif[/IMG]

                          Firstly however please note that I used my ex rally car engine mounts (because they were to hand) so, as already discussed in an earlier forum post, my engine is mounted higher and more upright in the engine bay. This altered position seems to work OK for me, it is however up to you to decide how this will affect your installation should you use standard PG1 gear box mounts. That is not to say that anything would be wrong with the position the standard PG1 gearbox mounts would dictate. It may even make fabrication of the engine mount easier.


                          1
                          This first picture highlights a Land Rover Freelander upper and lower engine mount part numbers KKU107940 KKU106150. I cut the rubber mounting bush of the upper mount you may choose not to. I believe that KKU106150 is as fitted to most Rover K series, but not on the Turbo engine I intend to fit next, which came with a cast iron mount. I will check and confirm that these part numbers are the ones my own car, but when I remove the engine.

                          2
                          The second picture is of the mounting in position during its manufacture and shows the box section metal being formed to follow the contour of the chassis rail. I used the existing threaded inserts factory welded into the chassis rail, threaded M10x 1.5 I believe.
                          3
                          [IMG]file:///C:%5CUsers%5CDavid%5CAppData%5CLocal%5CTemp%5Cmsoh tmlclip1%5C01%5Cclip_image002.gif[/IMG][IMG]file:///C:%5CUsers%5CDavid%5CAppData%5CLocal%5CTemp%5Cmsoh tmlclip1%5C01%5Cclip_image002.gif[/IMG]

                          The third photo is a general view showing where the Sierra or Escort 4x4 front engine mount fits. This is sold as an uprated mounting, and may be the reason why some vibration is transmitted to the car and may be something I revisit in the future. This is the mount I used https://shop.motorsport-developments...unts-136-p.asp they do of course come as a pair. Also shown it the section of 1300 Maestro engine mount that I used as a extra support. I suspect that this may not really be necessary, again up to you to decide.
                          4


                          The 4th image is a view from under the inlet manifold looking up to the chassis rail. 1 and 4 are areas of the mount part that I needed to fabricate. #1 is a section of the exhaust pipe from an Iveco aka a bit of scrap tube. Part 2 is the 4x4 mount described above. Number 3 is the upper Land Rover engine mount bracket from another angle.


                          I hope this shows enough detail to allow others to perform this engine swap should they wish. If more details are needed just ask.

                          Cheers
                          David

                          Dont know why its so distorted from what I wrote I hope it makes sense. I have tried to edit several times with no success sorry!
                          Last edited by toonarf; 24th September 2019, 18:38.
                          My Car Story

                          http://www.maestro.org.uk/forums/showthread.php?t=20252

                          Comment


                          • #58
                            A quick update on my turbo conversion. on target to be back on the road sometime........


                            Thanks for looking

                            David
                            My Car Story

                            http://www.maestro.org.uk/forums/showthread.php?t=20252

                            Comment


                            • #59
                              Glad to see you're back on it David
                              1958 Ford Consul Convertible. I love this car
                              1965 Ford Zodiac Executive. Fab cruiser being restored
                              1997 Jaguar Xk8 Convertible. Such a fab car
                              2004 MGZT cdti. Great workhorse
                              2004 MGZT V8. I love this car

                              Comment


                              • #60
                                Thanks Jeff
                                Notching the front cross member proved to a real nightmare I didn't work out much how the tow point and snubber mount are internally reinforced so I ended up cutting the crossmember incorrectly. But its all good now with the internal steel work reinstated but adapted to a narrowed profile. I now know it would have been easier to have had a bespoke manifold made which would have lifted the turbo above the cross member.
                                On another note I see someone has fitted an 1800 vvc K series to a Maestro https://www.facebook.com/groups/mand...6842708606744/

                                David
                                My Car Story

                                http://www.maestro.org.uk/forums/showthread.php?t=20252

                                Comment

                                Working...
                                X